Before installation, find the small switch labeled “Active Control” on the side of the Screenmate One. Using a paperclip or SIM eject tool, move the switch to the RIGHT position to enable sidebar control functions, allowing the Screenmate One to send commands to the Tesla (such as opening doors or unlocking the car). If you do not want these features enabled, leave the switch in the LEFT position.
Setup Steps
Prepare for Installation
Before touching the dashboard, watch the installation guide for your specific Tesla model all the way through at least once. The install itself is straightforward, but forcing connectors could make this project very expensive very quickly. If you are unsure about any step during installation, ask in the Discord before continuing. A quick question is better than replacing an MCU.
First Boot & System Access
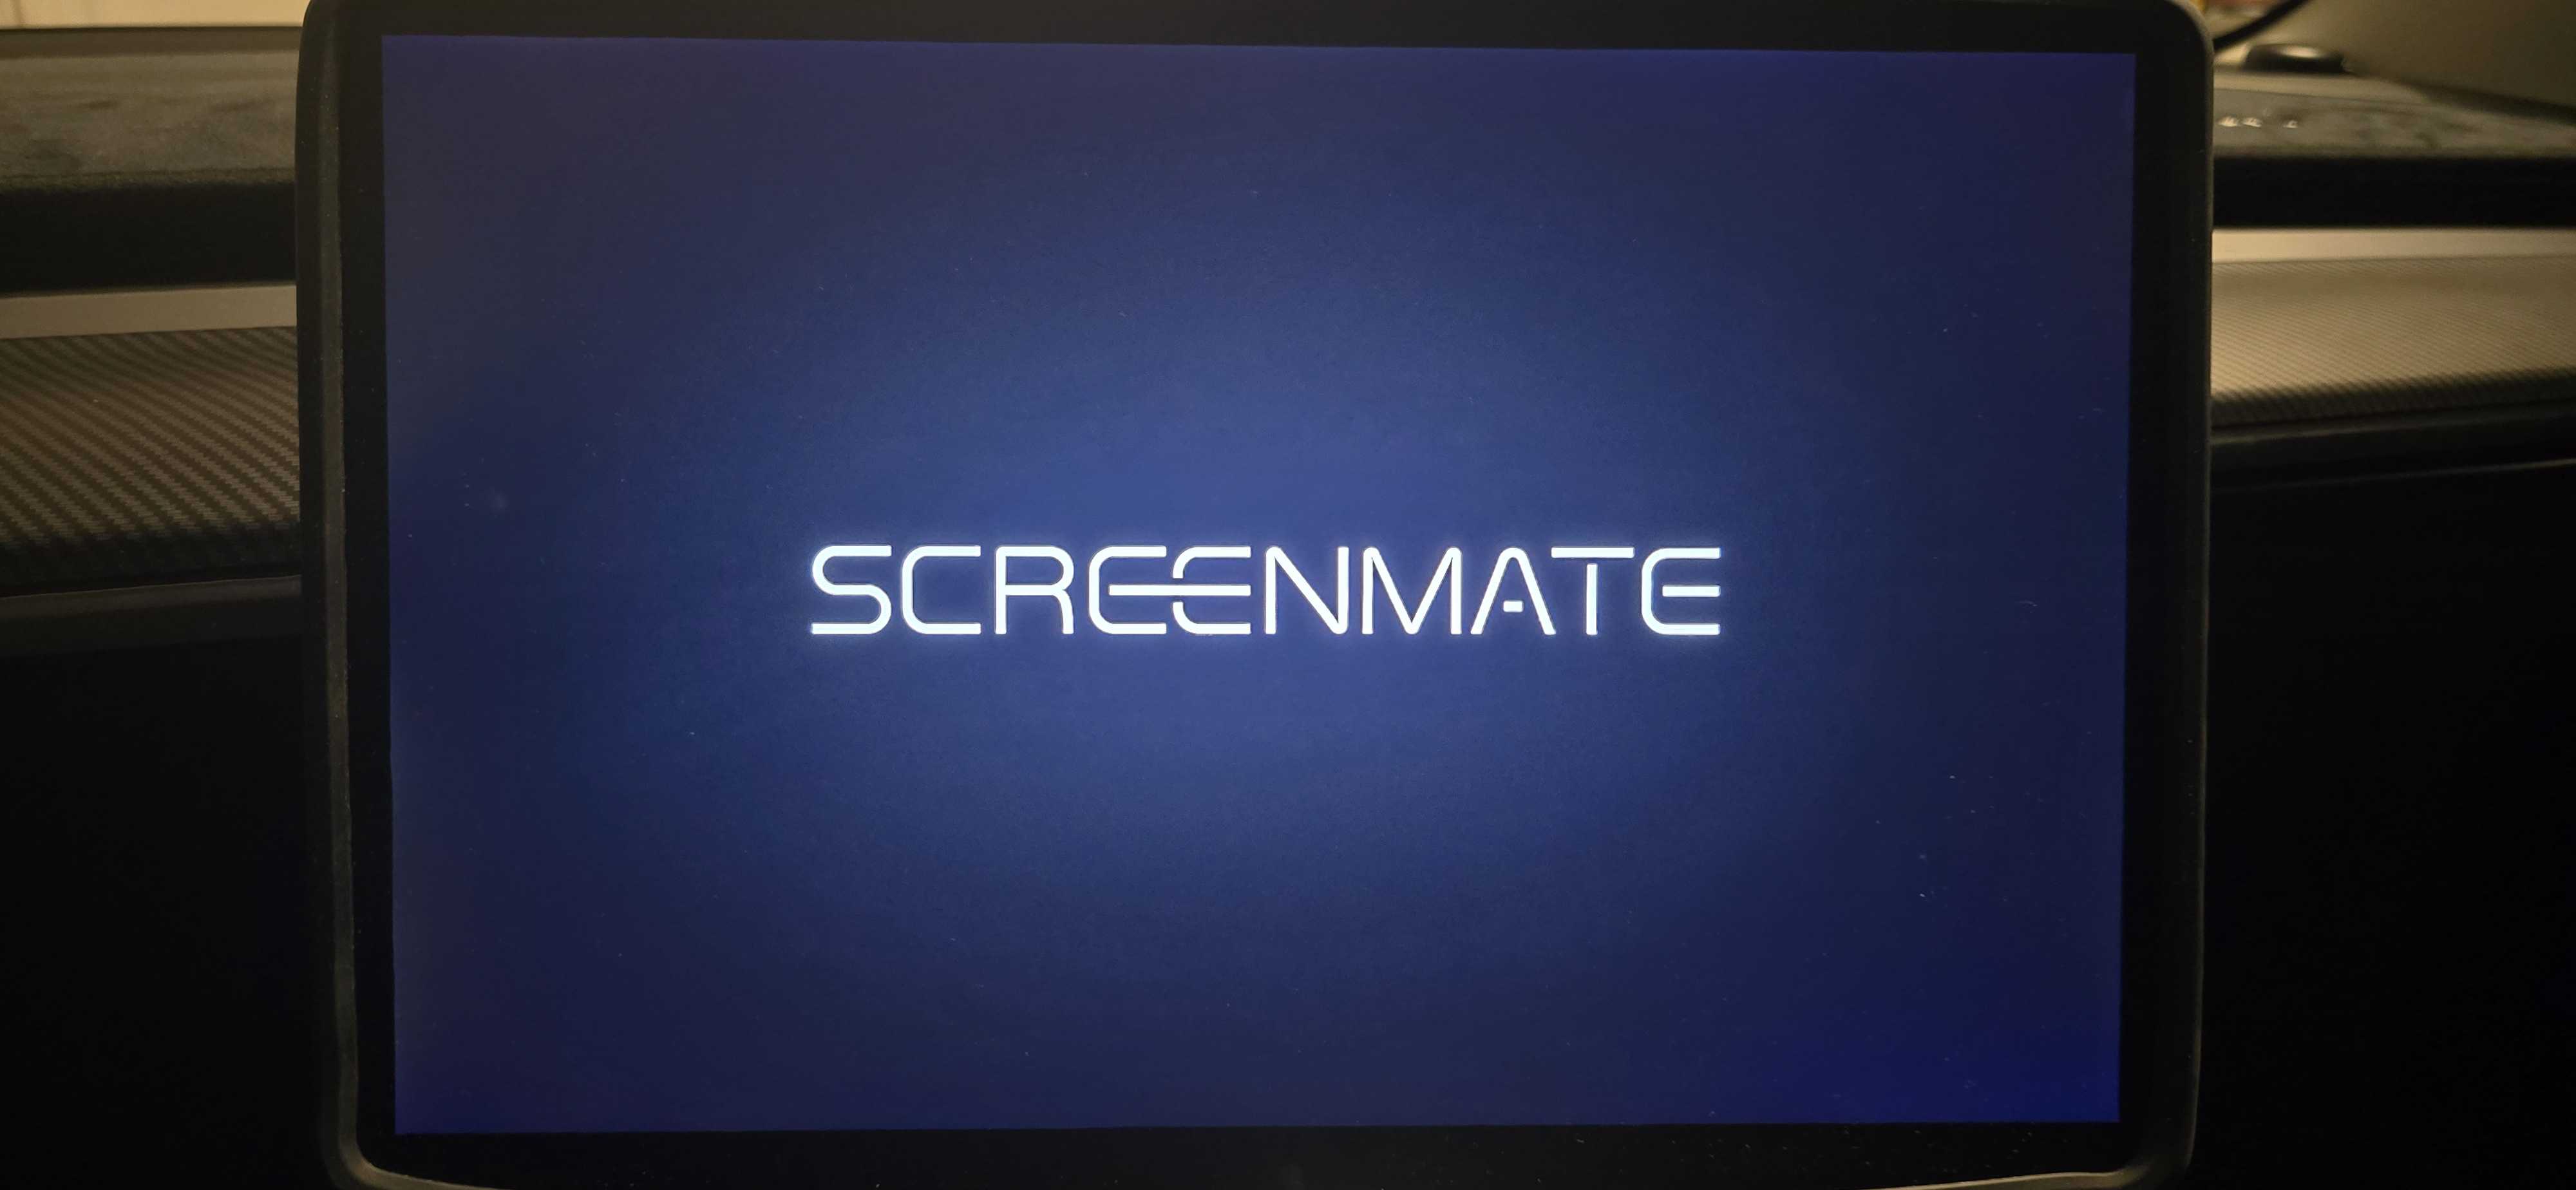
Once your Screenmate One is installed, press four fingers on the Tesla display at the same time. The screen should switch to the Screenmate logo. After approximately 20–25 seconds, the Screenmate One OS should appear.
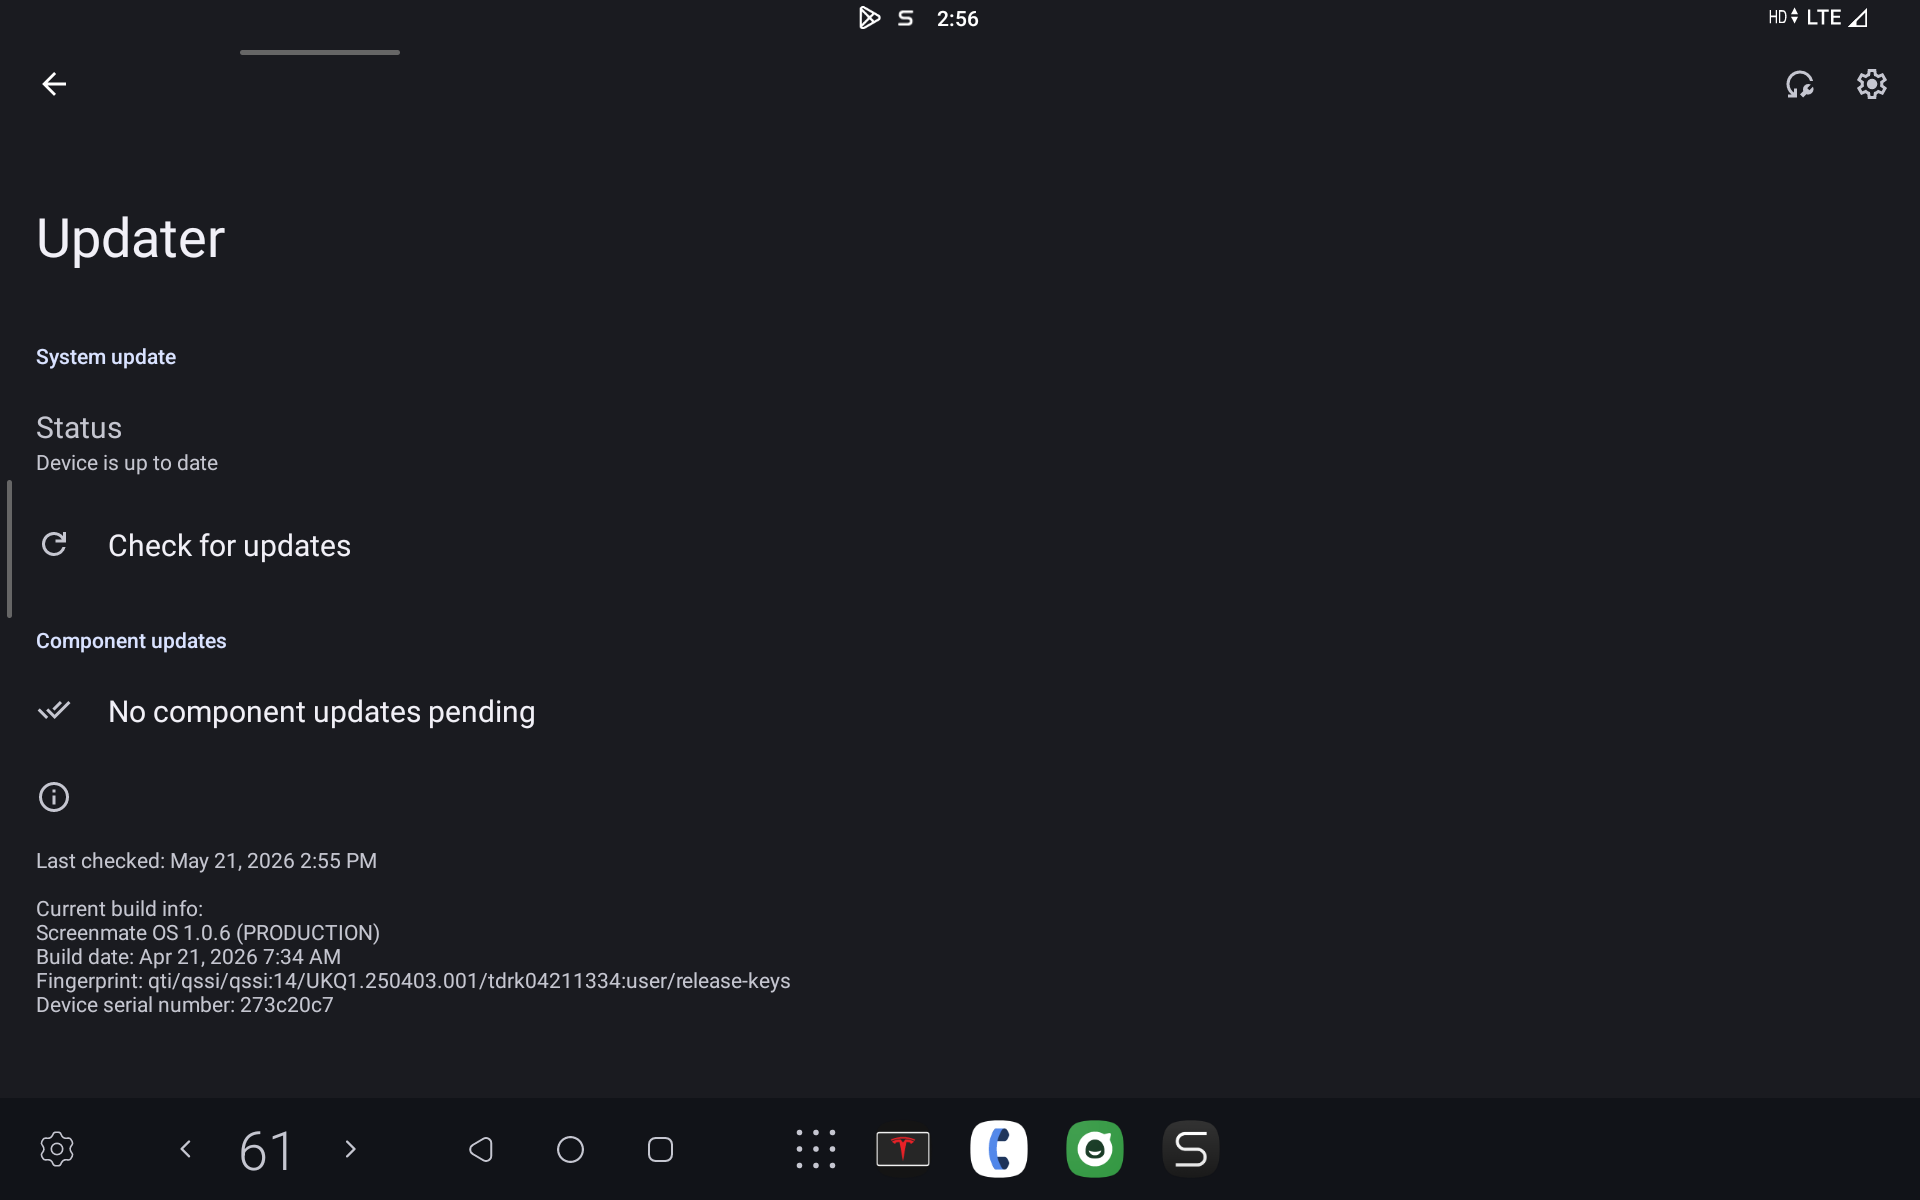
Connect to Wi-Fi & Update
Open Wi-Fi settings and connect the Screenmate One to your home network before doing anything else. Once connected, launch the Screenmate Updater app and press Check for Updates. If there is an update available, click Update System.
If your device is on update 1.0.5 or updates to 1.0.5 you'll need to download and open Firefox on the Screenmate One and visit:
https://screenmate.co/pages/fix-update
Follow the instructions there to be able to update to 1.0.9.
Flash Video MCU & CAN Updates
After updating to the latest firmware, open the Screenmate Flasher app and run the following updates in order:
During flashing, the Tesla display may flicker, reboot, or temporarily return to the native Tesla interface. This is normal. Wait for the flasher screen to return before proceeding to the next update.
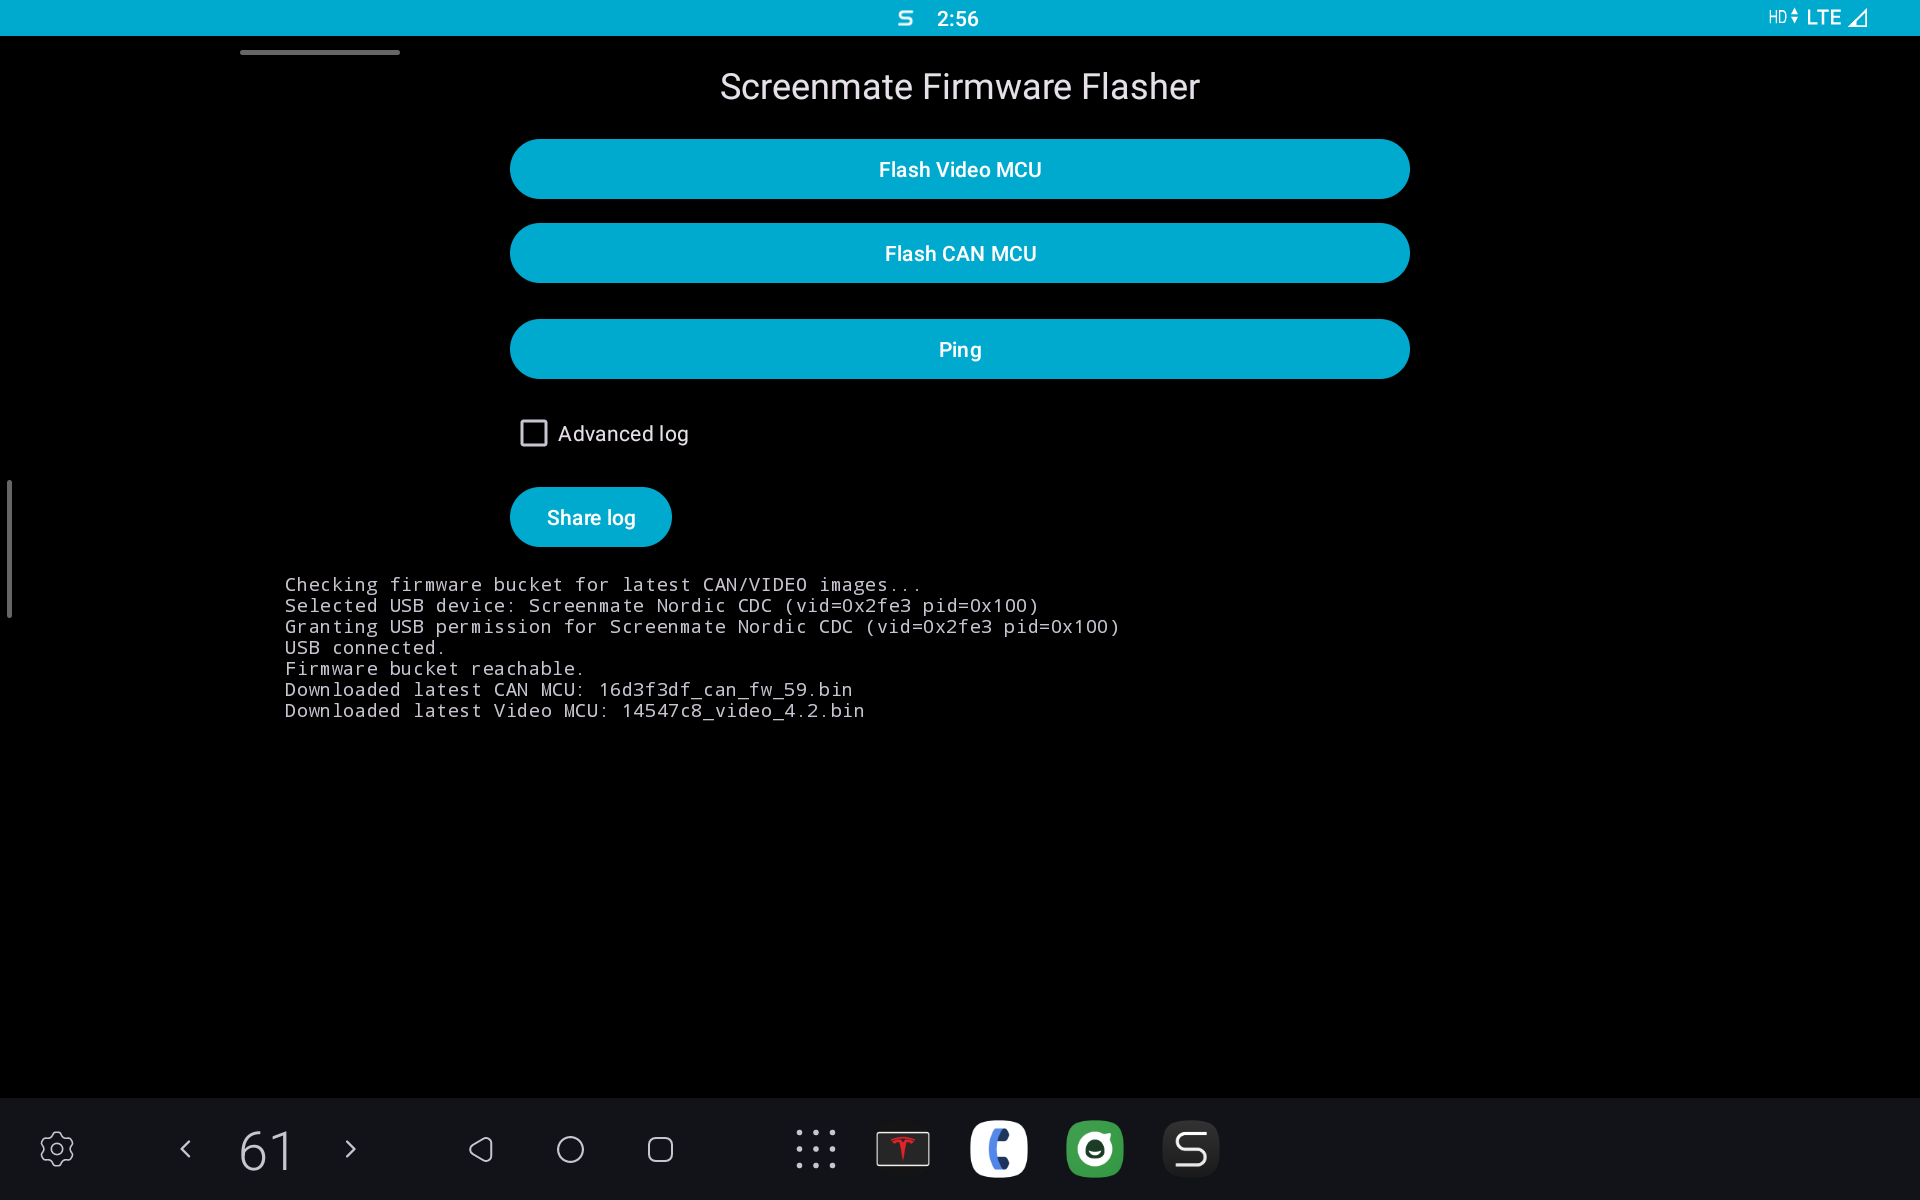
Do not interrupt power or force reboot the Screenmate One while flashing updates.
Bluetooth Setup
Below are the steps to setup the bluetooth connection from the Screenmate One to your Tesla. Alternatively, you can also check out the 'Extras' page to learn about using an FM transmitter for audio and free up the bluetooth spot for your phone.
The Screenmate One team is currently working on two audio solutions that help with latency as well as free up the Bluetooth on the Tesla. One is allowing you to stream audio over a Wi-Fi connection through the Tesla's browser with automatic connection setup and the other is wired audio output to your Tesla over USB. The wired audio output will require an additional converter. Note: There is no ETA on when these solutions will be released.
Finalize Configuration
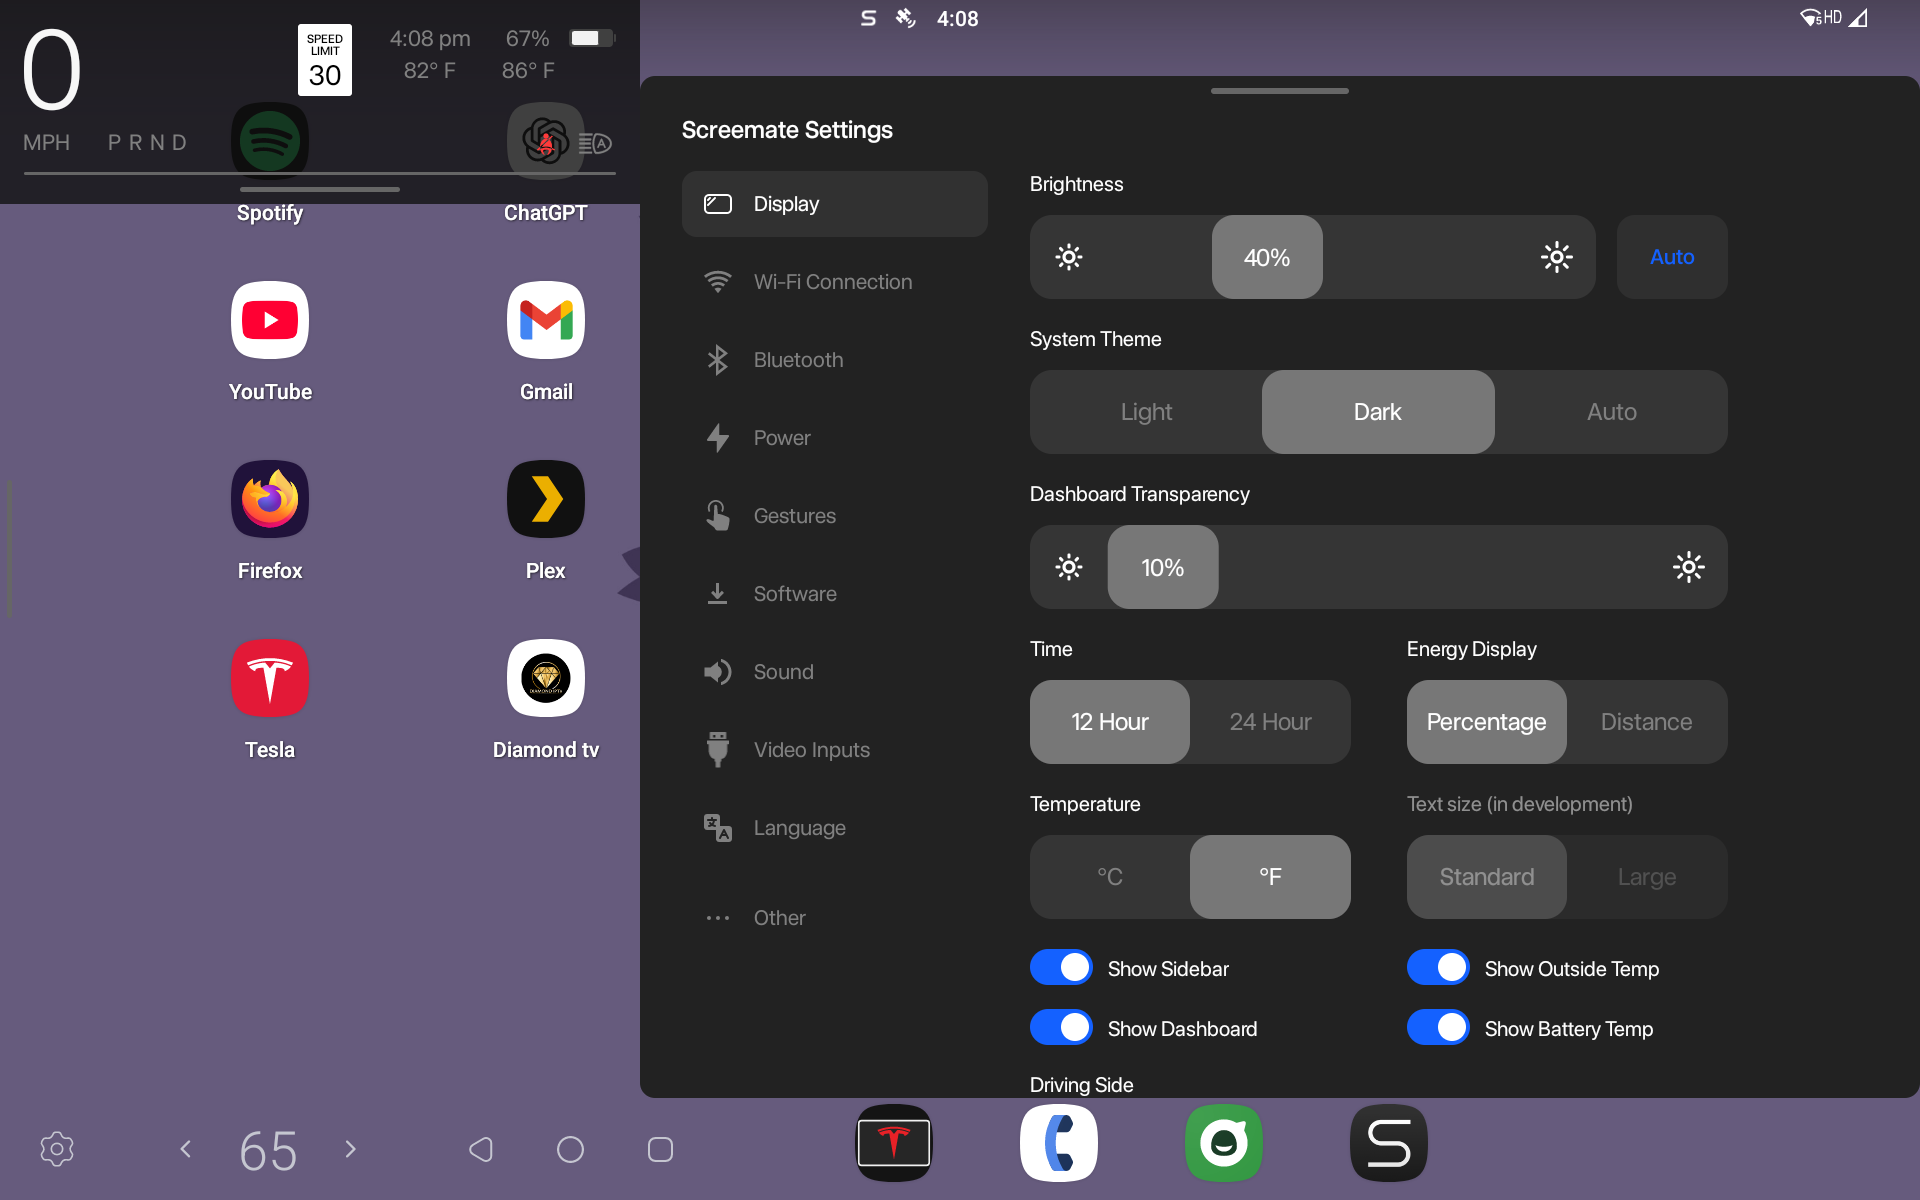
Open the Screenmate app and review every settings category carefully. Most options include tooltips explaining exactly what they do, including Bluetooth integration, audio routing, steering wheel controls, and Tesla-specific behavior. After that, you're all set. Feel free to sign into Google, install apps from the Play Store, configure your streaming services, and enjoy having Android integrated directly into your Tesla display.